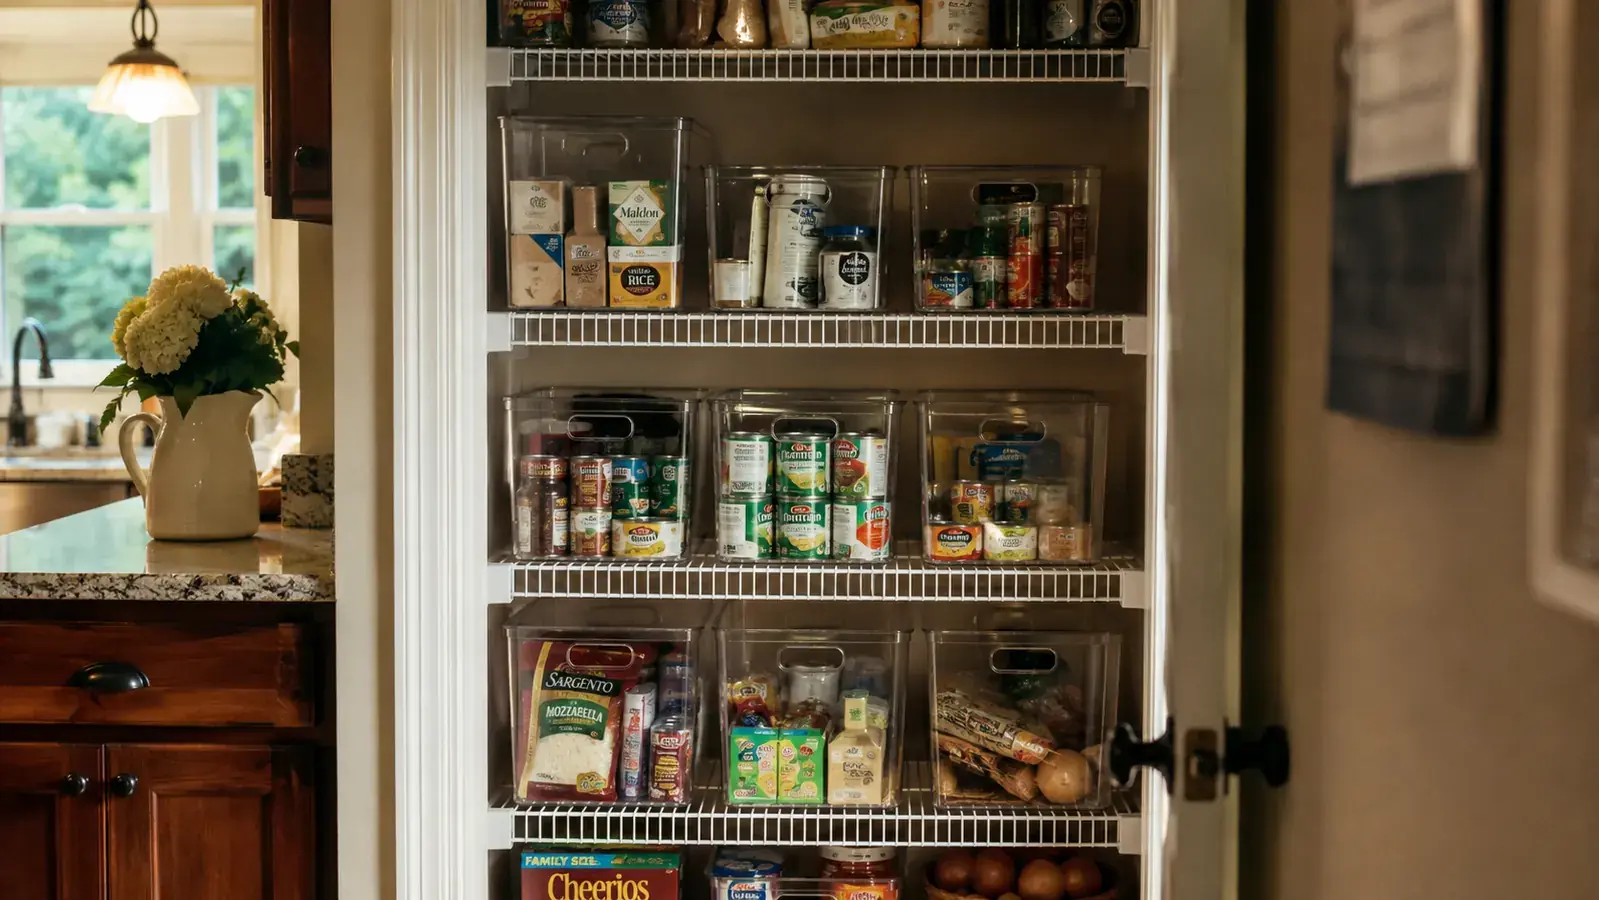
My pantry used to be the kind of closet I closed fast and hoped nobody opened while dinner was cooking. A bag of rice gone soft and spilling at the top, three half-used boxes of the same pasta shape, a granola bar graveyard wedged behind the flour, and a shelf of spice jars nobody could see past the cereal. I'm Colleen Ferris, and I've organized enough real, lived-in kitchens to know that the pretty pantry photos online are staged for one hour, not stocked for one ordinary Tuesday with two kids yelling about snacks from the next room.
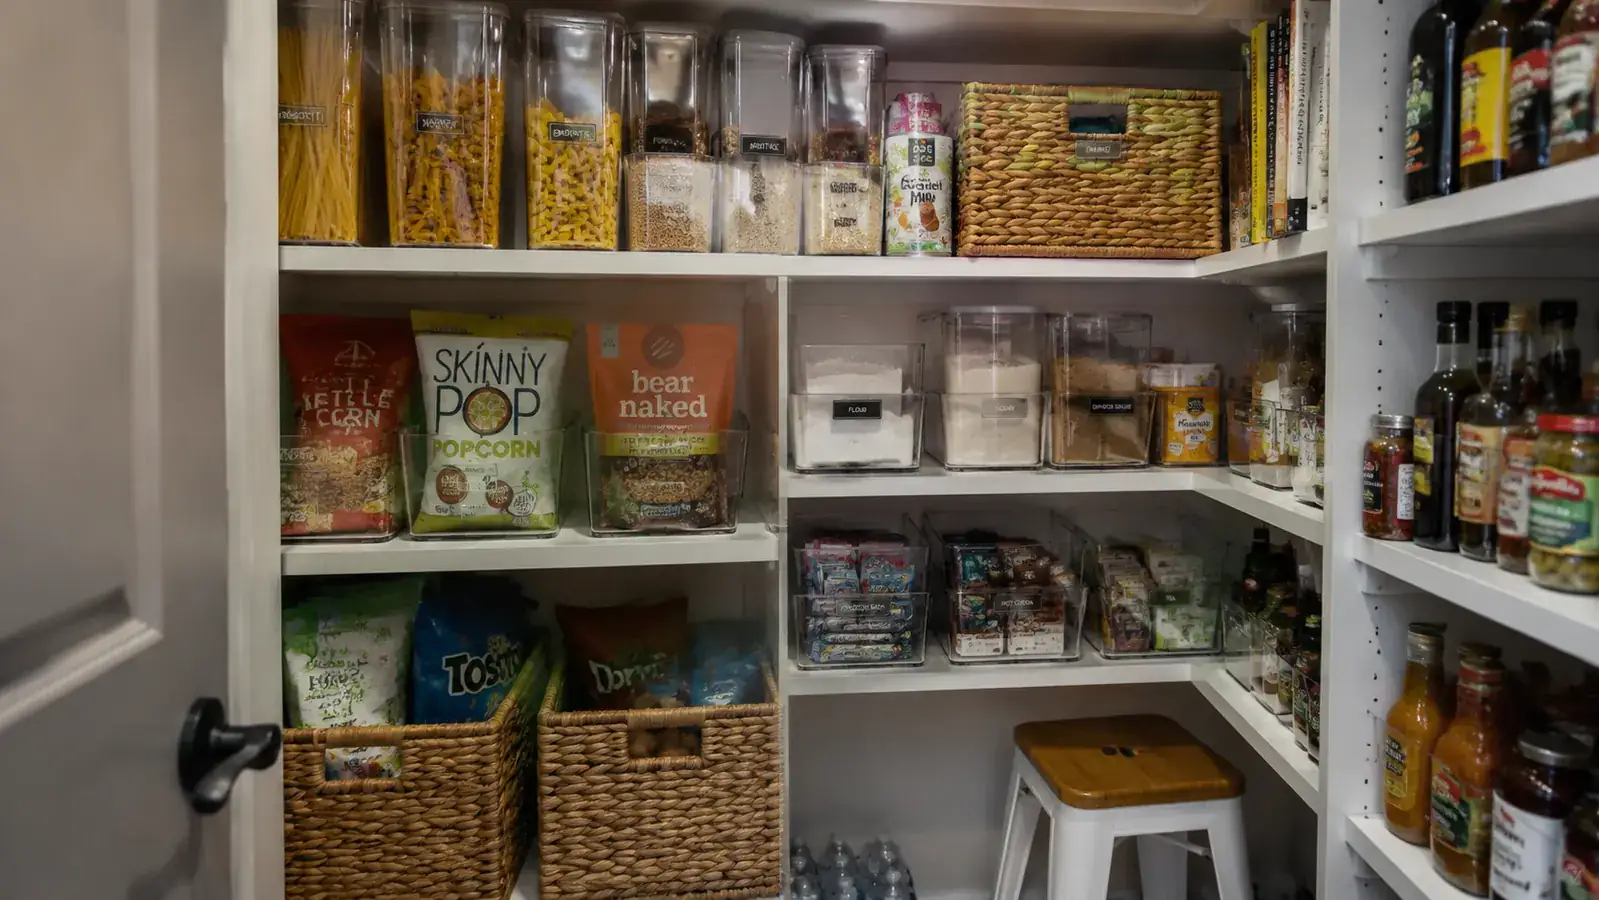
The fix that actually held for us wasn't a full remodel or custom built-ins. It was six clear pantry bins, the YIHONG Clear Storage Bins with handles, and about ninety minutes on a Saturday morning. A small pantry doesn't fail because it's small. It fails because everything inside it is in its original bag or box, all roughly the same beige color, all shoved wherever there was a gap. Clear bins fix that by making the pantry legible at a glance, which matters more in a tight space than in a big walk-in, because you don't have the square footage to spread things out and still find them. When every inch of shelf has to earn its keep, a system beats a pile every time.
Tired of digging through bags to find the cereal? Here's what actually fixed it
A small pantry doesn't need more shelves. It needs contents you can see without pulling three boxes out first. The YIHONG clear bins are the set I mount into every tight pantry I organize, because the sides are thick enough to hold up under real weight and the handles make pulling a full bin off a high shelf a one-hand job.
Amazon Check Today's Price on Amazon →Step 1: Empty the pantry completely and sort into honest piles
Pull everything out. Not just the front row, everything, including the mystery items pushed to the back corner of the top shelf and whatever's been living behind the door on a hook since you moved in. Set up a folding table or clear a stretch of counter and lay it all out where you can actually see it, because a pantry this size hides more clutter per square foot than a bigger one ever will. While the shelves are bare, wipe them down and check the shelf liner too, since crumbs and sticky rings are a lot easier to deal with without a wall of cans in the way.
Sort into rough piles as you go: breakfast items, baking staples, snacks, canned and jarred goods, and anything expired or duplicated. My husband Dominic tried to skip this step the first time and just started shoving things back onto the shelves in a slightly different order. Two weeks later we were right back where we started, because nothing had actually been decided, just relocated to a new spot on the same crowded shelf.
This is also the point to be honest about expiration dates and duplicates. Small pantries accumulate three half-open bags of the same shredded coconut because it was faster to buy a new one than dig to the back of the shelf. Toss what's stale, and set duplicates in a box to use up first before buying more. A clear bin only works if what goes into it is worth keeping in the first place, and there's no point building a beautiful system around food nobody's actually going to eat.
Step 2: Measure your shelves before you buy a single bin
Measure the depth, width, and height of every shelf in your pantry, and write the numbers down instead of trusting memory once you're standing in a store aisle. A small pantry usually has shelves that are shallower than a standard cabinet, and a bin that's an inch too deep will hang off the edge and catch on the door every time it swings shut. Measure the door swing and any interior trim too, since a bin that clears the shelf but not the door frame is just as useless.
Bring those measurements with you when you shop, and pick a bin size that leaves roughly an inch of clearance on each side for pulling it in and out without scraping the shelf above. If your pantry has a deep corner shelf that's awkward to reach into, a bin with a wide handle solves it better than a lazy Susan does in most small closets, since a turntable needs more clearance to spin than a tight pantry usually has. We compared the two directly in clear pantry bins versus lazy Susan turntables if you're weighing which one fits your actual shelf depth.
Buy one bin size for most of the pantry rather than mixing sizes on every shelf. Uniform bins stack cleanly and use vertical space you'd otherwise lose to gaps between mismatched containers. A set of six, like the YIHONG bins, is usually enough to cover breakfast, baking, snacks, and grains in a pantry the size of a standard hallway closet, with a couple left over for the fridge or under the sink.
Step 3: Group by category and give every bin one job
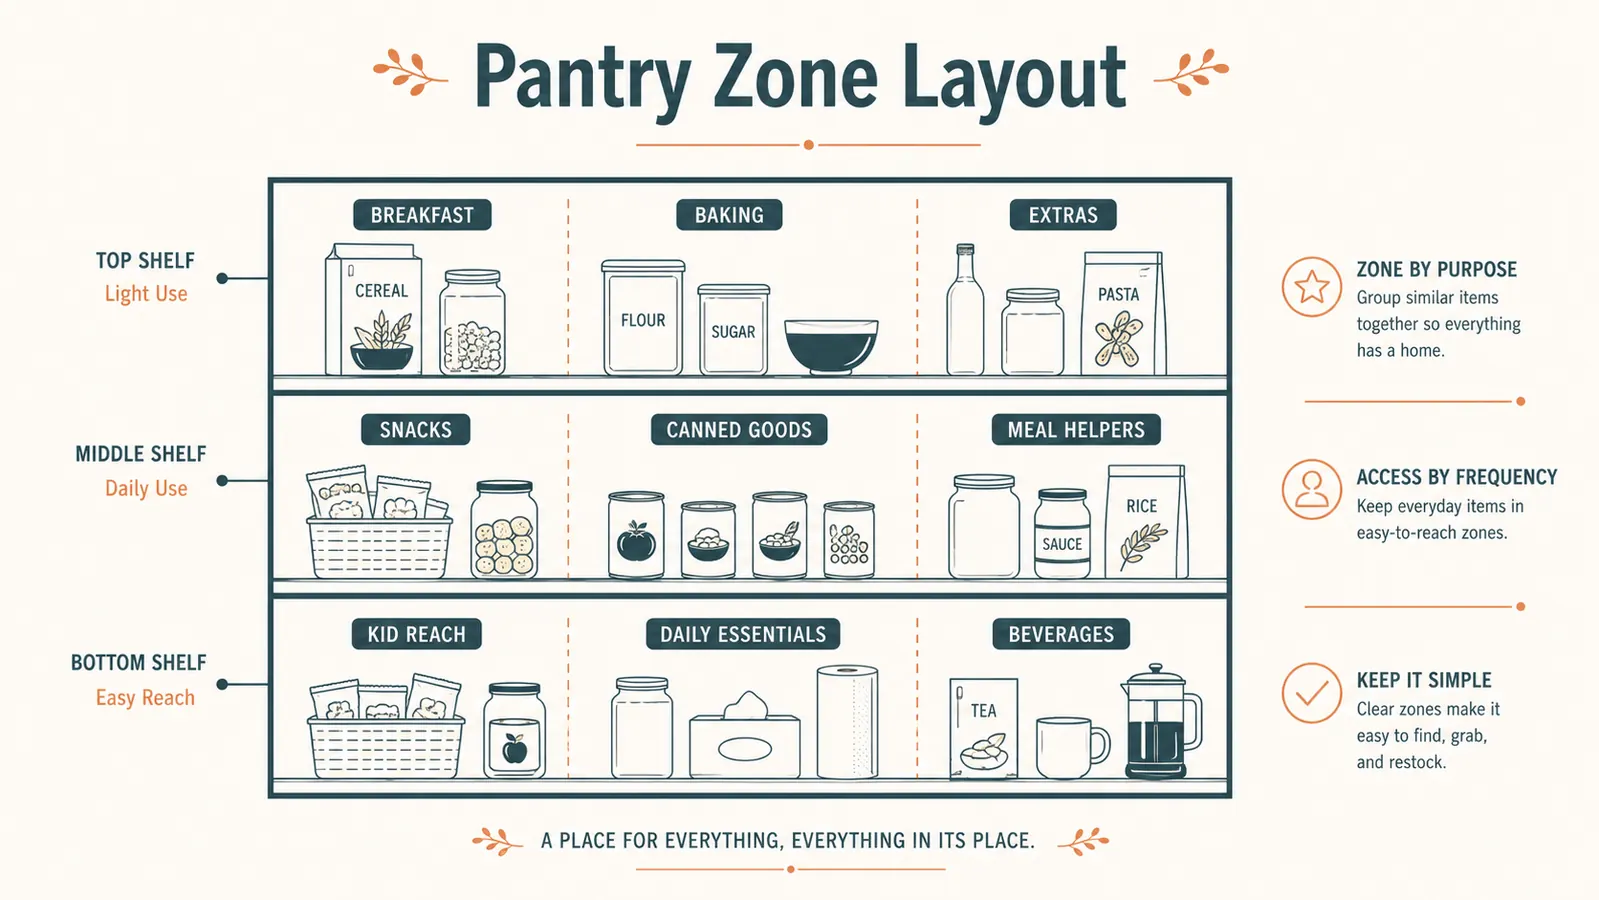
This is the step that turns a pantry into an actual system instead of a closet of clear boxes that still don't have a logic to them. Assign each bin a single category: one for pasta shapes, one for baking staples like flour and sugar, one for breakfast items, one for snack bags decanted out of their crinkly original packaging. Resist the urge to make a catch-all bin for "miscellaneous," because that bin becomes the new junk drawer within a month, only this time it's a very tidy-looking junk drawer.
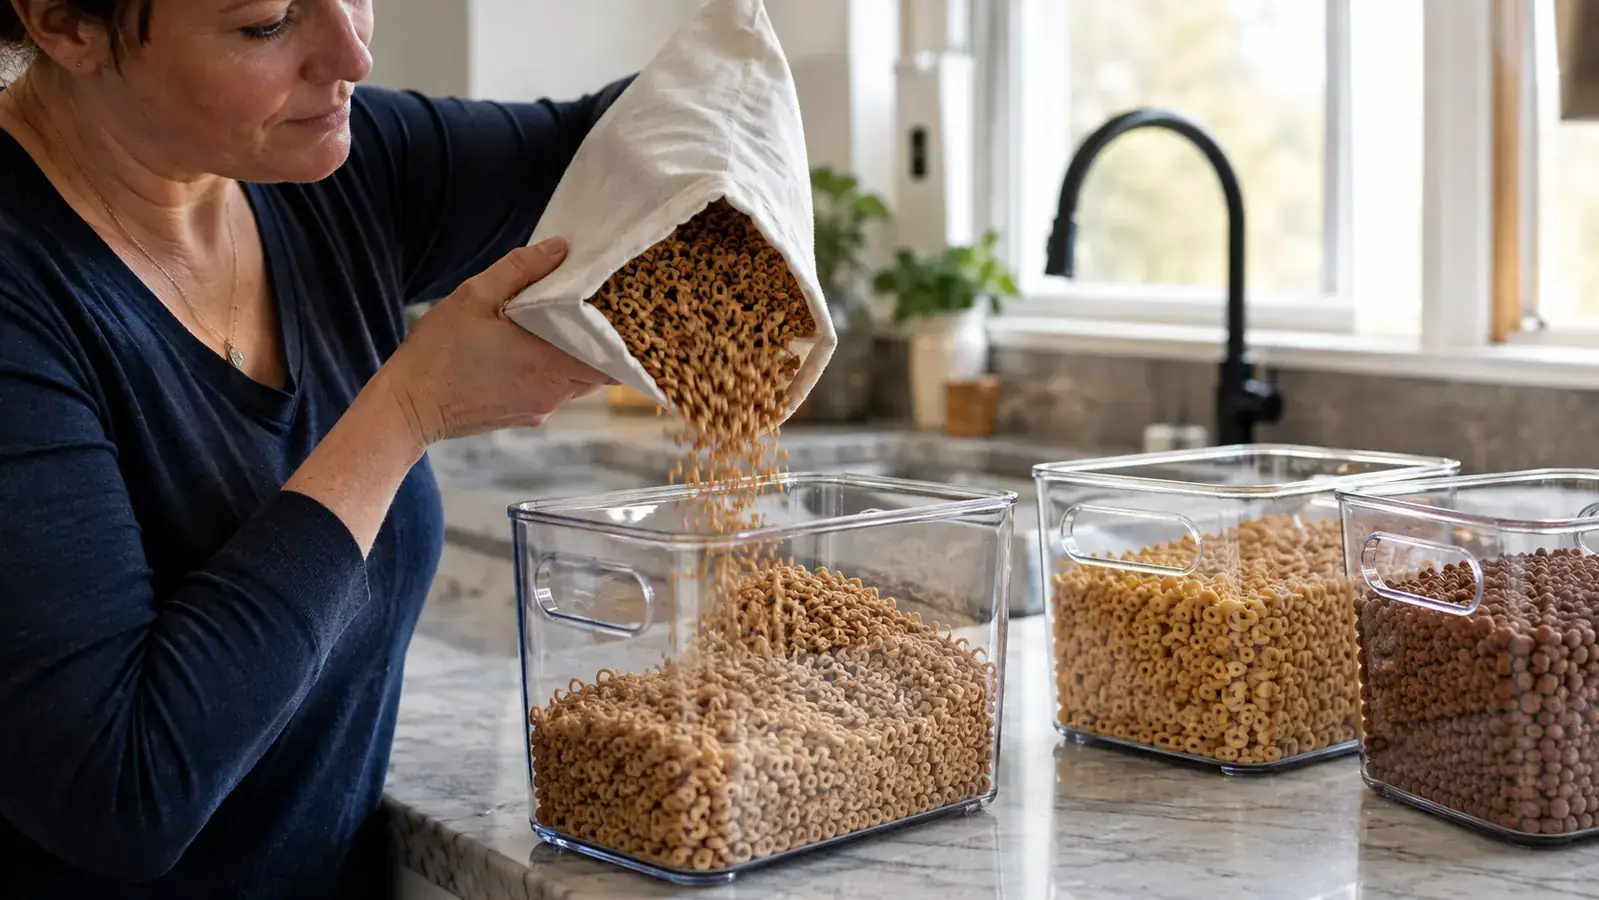
Decant loose or bagged items into the YIHONG bins rather than storing boxes inside boxes. A cereal box takes up more shelf height than the cereal itself needs once it's poured into a bin, and that reclaimed height is often exactly what a small pantry is missing. My sister Marisol was skeptical the first time she watched me do this in her kitchen, certain it would take all afternoon, but once the YIHONG bins were assigned it took about twenty minutes to decant a full pantry's worth of dry goods.
Leave a little breathing room in each bin rather than packing it to the lid. A bin that's completely full on day one has nowhere to go the next time you restock from a grocery trip, and you'll end up back to shoving extra bags on top of the shelf instead of inside the system you just built. I plan for each bin to sit at about three-quarters full right after setup, which gives it a week or two of buffer before it needs a real top-off.
Step 4: Label at kid height, not just adult height
Clear bins solve most of the guesswork on their own, since you can see the contents without opening the lid. But labels still matter, especially for bins that hold similar-looking items like flour and powdered sugar, or for a household where more than one person is putting groceries away. Print or write labels that face outward and sit at a height a seven-year-old can actually read, not just where an adult glances while reaching over a shelf.
My daughter Isla is seven and my son Cormac is four, and the day I moved snack labels down to their eye level was the day they stopped asking me to get snacks for them every single afternoon. That's a bigger win in a busy household than it sounds like on paper. A pantry that only the adult who organized it can navigate isn't actually organized, it's just tidy for one person.
Keep the label style simple and consistent across every bin. Matching fonts and placement make the whole pantry read as one system at a glance, which is part of why clear bins photograph well, but the real payoff is that anyone opening the door mid-dinner-rush can find what they need in seconds instead of scanning every shelf. Dry-erase labels are worth the extra minute over printed ones if you swap contents seasonally, since you're not reprinting a sticker every time the granola bar flavor changes.
Step 5: Build a five-minute Sunday reset
A small pantry isn't a one-time project, it's a system that needs a light touch on an ongoing basis, especially with more than one person pulling groceries in and out of it. Once a week, usually right before or after a grocery run, walk the shelves and top off any bin that's running low, wipe up crumbs, and move anything that's landed in the wrong spot back to its bin.
This genuinely takes about five minutes if you do it weekly instead of letting a month of drift pile up. It's also the moment to notice which bin is always nearly empty and which one never seems to move. That tells you something about how your household actually eats, and it's worth reassigning bin sizes or shelf position around that pattern instead of the layout you guessed at on move-in day. My neighbor Yvonne, who borrowed the idea for her own pantry, told me the weekly reset was the part that made the system stick, not the initial setup. We wrote up how these exact bins held up over six months of real, daily use, including where a couple of the lids started to warp, in our long-term pantry bin review.
What Else Helps
Clear bins handle dry goods, snacks, and baking staples well, but they aren't the right home for everything in a small pantry. Cans and jars do better on a shallow riser shelf that lets you see the back row instead of stacked bin-style, since round items roll and settle unevenly inside a rectangular bin. A door-mounted rack is often the better spot for spice jars and small condiment bottles, freeing up shelf depth for the YIHONG bins doing the heavier lifting.
A short stepstool tucked into the corner of the pantry also matters more than it sounds like it would in a small space, especially with kids in the house. If the only way to reach the labeled snack bin is for a four-year-old to climb onto a shelf, the whole system breaks down fast. Keep a stool right there so the reach height you planned in step four actually holds up in daily use.
Rotate seasonal or bulk-bought items, holiday baking supplies, a case of canned pumpkin from a fall sale, into a lower shelf or a bin near the back rather than prime eye-level real estate. That keeps the bins you use every single day, breakfast and snacks especially, at the height that's easiest to reach without pulling other things aside first. And if your household grows or your grocery habits change, it's easier to add a matching bin or two later than to redo the whole layout, so buy from a set that's likely to still be sold in a year rather than a one-off closeout size.
A pantry this size doesn't need more shelves. It needs a system where every item has exactly one bin, and every bin has exactly one job.
Stop losing snacks behind the flour bag
A set of matching clear bins is what makes steps two through five above actually work in a small pantry, not just on the day you set it up. Check today's price and available sizes before you plan your shelf layout.
Amazon Check Today's Price on Amazon →